

Best Roast Profile for Beginners: A 2026 Guide
Table of Contents
- The Best Roast Profile for Beginners: Start Simple
- How to Create a Coffee Roast Profile at Home
- Coffee Roasting Stages: What Happens and When
- First Crack Coffee Roasting: Your Finish Line
- Coffee Roast Levels Explained (and Which to Try First)
- Adjusting Your Roast Profile: A Decision Tree
- Safety, Ventilation, and Consistency for Home Roasting
- Frequently Asked Questions
Last Updated: October 13, 2026
The Best Roast Profile for Beginners: Start Simple
The best roast profile for beginners is a simple medium roast that reaches first crack in roughly 9 to 11 minutes and finishes before second crack begins.
At Tampa Bean Company, we roast for people who brew at home daily. Most beginner failures come from chasing complexity too early: six heat adjustments won't save a batch if you can't hear first crack or read your log.
Build one starter profile, log it the same way every time, and adjust based on taste.
How to Create a Coffee Roast Profile at Home
Creating a coffee roast profile means recording three things per batch: charge temperature, stage times, and when first crack starts.
A roast profile is the planned sequence of temperatures and times applied to a batch of green coffee, from charge through cooling. Think of it as a recipe with a timeline attached.
Most home batches finish in under 15 minutes, so small mistakes compound fast.
Set Your Charge Temperature and Batch Size
Charge temperature is the drum temperature when the beans go in. For a beginner medium roast, aim for around 200°C (392°F) and hold batch size constant at whatever your roaster handles comfortably, often 250g to 500g.
Batch size matters more than most guides admit: a full drum and a half-full drum absorb heat differently and reach first crack at different times. Pick one size and stay there for your first several roasts.
A Reproducible Starter Profile (With Numbers)
Most beginner guides say "aim for a medium roast" without giving you a number. Here is a concrete starting point for a drum roaster or stovetop setup with a thermometer.
Target: 250g batch, medium roast, first crack at 9-11 minutes, total roast 11-13 minutes.
| Stage | Time Window | Bean Color | Target Bean Temp | Heat Setting (relative) |
|---|---|---|---|---|
| Charge | 0:00 | Green | 200°C (392°F) drum temp | , |
| Turning point | 1:00-1:30 | Green to pale yellow | 80-100°C (176-212°F) | High |
| Drying phase | 1:30-4:30 | Pale yellow to tan | 100-150°C (212-302°F) | High, steady |
| Maillard phase | 4:30-8:30 | Tan to light brown | 150-190°C (302-374°F) | Medium-high, then medium |
| First crack | 9:00-11:00 | Medium brown | 196-205°C (385-401°F) | Medium-low |
| Development | 1:00-2:00 after first crack | Medium brown | 205-215°C (401-419°F) | Low |
| Drop & cool | 11:00-13:00 | Medium brown | , | Cool quickly |
This is a baseline, not a magic recipe. If your roaster runs hot you may hit first crack at 8 minutes; if it runs cool, at 12.
Starter sequence:
- Preheat to your target charge temperature and let it stabilise for several minutes.
- Drop the beans and start your timer immediately.
- Note the turning point, the lowest reading before the beans gain heat again.
- Hold steady heat through the drying phase rather than adjusting constantly.
- Reduce heat as first crack approaches so the finish does not run away.
- Drop the beans when first crack slows to a few pops per second, typically 1-2 minutes after it begins.
Log Every Batch the Same Way
A roast log turns guesswork into a decision. Record the same fields every time, even when a batch goes badly.
| Log Field | What to Record | Why It Matters |
|---|---|---|
| Batch size | Weight in grams | Keeps comparisons fair |
| Charge temperature | Starting drum temp | Sets your whole timeline |
| Turning point | Time and temp | Shows how fast heat took hold |
| First crack | Time and temp | Your main reference point |
| Total roast duration | Minutes and seconds | Controls development |
| Weight loss | Percentage after cooling | Rough guide to roast level |
| Tasting note | One or two words | Connects profile to flavour |
Coffee Roasting Stages: What Happens and When
Coffee roasting stages are the drying phase, the Maillard phase, and the development phase, followed by cooling. Each changes the bean's colour, aroma, and internal chemistry within a rough time window.
Drying, Maillard, and Development Phases
The drying phase covers roughly the first third of the roast. Beans lose surface moisture, turn from green to yellow, and smell like hay or bread.
The Maillard phase begins as beans turn tan and then brown.
Development phase runs from the start of first crack to the end of the roast. Its length relative to total duration shapes how bright or muted the cup tastes.
Specialty Coffee Association guidance on roasting
First Crack Coffee Roasting: Your Finish Line
First crack coffee roasting is the audible popping sound beans make as internal moisture escapes and the bean structure expands.
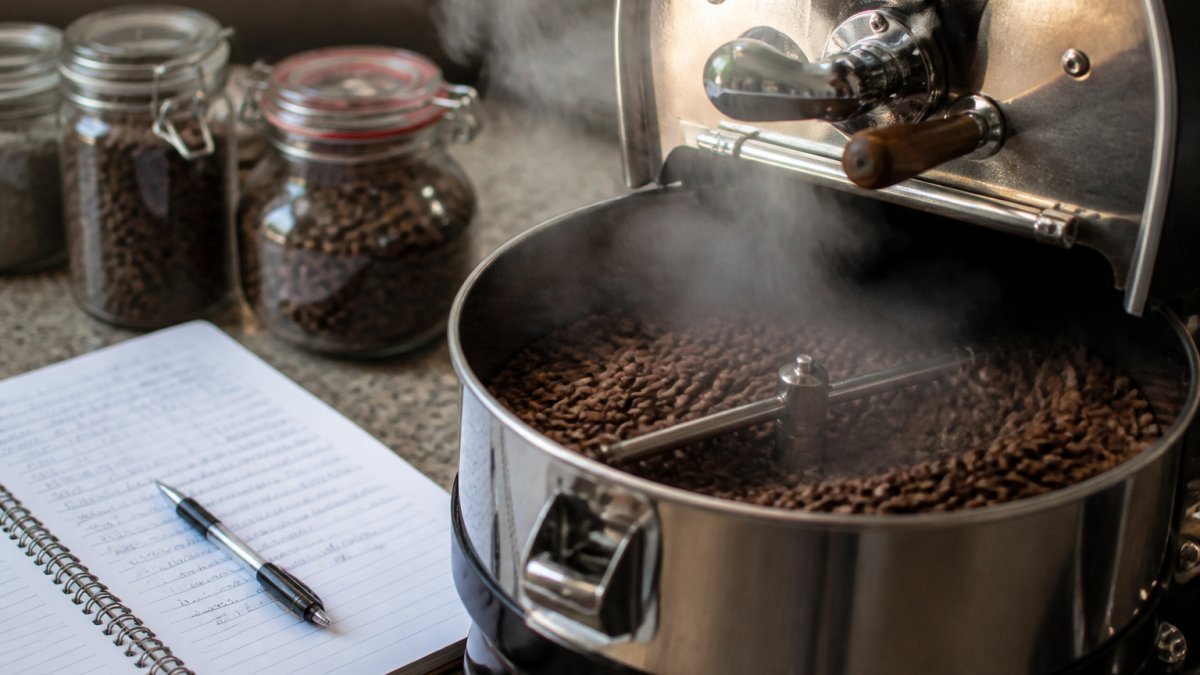
It usually sounds like quieter, less frequent popcorn.
Second crack is a sharper, faster crackle that arrives later. For a beginner medium roast, stop before it starts.
Coffee Roast Levels Explained (and Which to Try First)
Coffee roast levels run from light through medium, medium-dark, and dark, and the level you choose determines how much of the bean's origin character survives into the cup.
| Roast Level | Colour | Typical Flavour | Try It If |
|---|---|---|---|
| Light | Cinnamon to tan | Floral, fruity, citrus notes, higher acidity | You brew pour-over and want clarity |
| Medium | Milk chocolate brown | Sweetness, body, balanced acidity | You are learning to roast |
| Medium-dark | Deep brown | Nutty, cocoa, lower acidity | You like espresso and milk drinks |
| Dark | Dark brown, oily | Bittersweet, smoky flavours, low acidity | You want a bold, heavy cup |
Start with medium. It is the most forgiving level to hit repeatedly and gives you enough sweetness and body to enjoy while learning.
If you would rather taste the finished result than roast it yourself, our Breakfast Blend is a medium roast with a smooth South American base, and our House Blend delivers nutty, sweet chocolate notes with mild citrus in a medium roast that stays consistent bag to bag.


Adjusting Your Roast Profile: A Decision Tree
Adjusting a roast profile follows a fixed order: change one variable, roast again, taste, then decide. Changing three things at once tells you nothing.
Most beginners adjust on bean colour alone, which is unreliable under kitchen lighting. Use taste as your primary signal, then trace the defect back to a specific phase of the roast.
Step 1: Identify the Defect in the Cup
Brew a small sample of each batch the same way every time, same dose, water temperature, and brew method. Taste it black and ask: Is it sour or bitter? Thin or heavy? Sweet or flat?
Step 2: Trace the Defect to a Roast Phase
| Taste Defect | Likely Phase Issue | Mechanism |
|---|---|---|
| Sour, grassy, thin | Underdeveloped (development phase too short) | Acids and sugars haven't had time to react; Maillard products are incomplete |
| Bitter, ashy, flat | Overdeveloped (development phase too long or too hot) | Sugars have carbonized; volatile aromatics have burned off |
| Baked, cardboard, no sweetness | Stalled Maillard (drying or Maillard phase too slow) | Heat was too low early, so the roast stretched without building sweetness |
| Uneven colour, some beans light some dark | Airflow or batch size issue | Beans aren't moving consistently through the hot air or drum |
| Good flavour but inconsistent batch to batch | Charge temperature or bean weight drift | Small variations in starting conditions shift the whole timeline |
Step 3: Make One Change
Use this sequence to diagnose a batch:
- Sour, thin, or grassy? The roast is underdeveloped. Extend development time by 30 to 60 seconds and keep total duration the same. Do not increase heat, that will just push you into second crack faster.
- Bitter, ashy, or flat? The roast ran too long or too hot at the end. Shorten development by 30 seconds and lower your heat application before first crack.
- Baked, cardboard-like, no sweetness? The roast stretched too long overall. Increase heat earlier so the Maillard phase moves faster. Aim to reach first crack 30-60 seconds sooner.
- Uneven colour across beans? Your batch size is too large for the drum or your airflow is too low. Reduce batch size first. If that doesn't fix it, increase airflow during the drying phase.
- Good flavour but inconsistent between batches? Your charge temperature or bean weight is drifting. Tighten your logging. Weigh every batch to the gram and preheat to the same temperature every time.
Change one item per roast. Two changes and you will not know which one worked.
Step 4: Re-Taste and Compare
After each adjustment, wait at least 24 hours before tasting, roasted coffee needs time to degas, and flavours shift noticeably in the first few days. Compare the new batch side-by-side with the previous one. If the defect improved, keep the change; if it got worse, revert and try a different lever.
A Note on Equipment and Batch Size
A profile cannot be copied exactly between roasters: a drum roaster holds heat differently than an air roaster, and a 250g batch behaves differently than a 500g batch. Use the starter profile as a target, not a script. If your roaster runs hot, lower your charge temperature by 10-15°C; if it runs cool, increase it. The decision tree above works regardless of equipment because it is based on taste, not on matching someone else's numbers.
Safety, Ventilation, and Consistency for Home Roasting
Home roasting produces smoke, chaff, and real heat, so ventilation and a clean workspace come before flavour.
Roast outdoors, in a garage with the door open, or under a range hood that vents outside. Chaff is flammable and accumulates quickly, so empty your chaff collector every batch.
For consistency, weigh every batch to the gram, preheat to the same charge temperature, and store roasted beans in an airtight container away from light.
National Fire Protection Association resources on home fire safety
Roasting your own coffee is rewarding, but it is a project with a learning curve, and some mornings you just want a great cup without the logbook. Tampa Bean Company delivers fresh, expertly roasted coffee straight to your door, with your choice of whole bean or a custom grind matched to your brewing method.
Frequently Asked Questions
What is the best roast profile for a beginner?
Start with a medium roast profile: charge your roaster to around 200°C, aim for first crack at 9 to 11 minutes, and drop the beans 1 to 2 minutes after first crack ends. This gives you a forgiving window, avoids the smoke and oil of dark roasting, and works with almost any green coffee you buy. Log charge weight, charge temp, first crack time, and drop time every batch so you can repeat it.
How do you know when a coffee roast is finished?
Most beginners finish 1 to 2 minutes after first crack for a medium roast. Listen for the cracking to slow, watch the bean color shift to a medium brown, and check the aroma for toasted bread rather than smoke. If you are aiming darker, wait for second crack to begin, but stop before the beans turn oily and black. A roast log with time and temperature at drop makes this repeatable.
What is first crack in coffee roasting?
First crack is the audible popping sound beans make when moisture inside them turns to steam and the bean structure expands. It usually happens between 196°C and 205°C, roughly 8 to 12 minutes into a home roast depending on batch size and roaster. First crack marks the start of the development phase, and the time you spend after it largely decides how the final cup tastes.
Do beginners need coffee roasting software?
No. A notebook and a timer will get you through your first dozen roasts. Write down charge weight, charge temperature, first crack time, drop time, and total roast duration. Once you can repeat a batch by hand, software helps you compare curves and spot drift. The habit of recording matters more than the tool, so start simple and upgrade when your notes stop being enough.
How can beginners make their coffee roasts more consistent?
Keep batch size, charge temperature, and heat settings identical between roasts, and change only one variable at a time. Weigh beans to the gram, preheat the same way every session, and note ambient temperature since a cold garage roasts differently from a warm kitchen. Cupping two batches side by side after 24 hours of rest shows you which change actually improved the cup.
What are the four types of coffee roasts?
The four main levels are light, medium, medium-dark, and dark. Light roasts stop shortly after first crack and keep more acidity and floral or fruity notes. Medium roasts balance sweetness and body. Medium-dark roasts add cocoa and nutty depth with less acidity. Dark roasts run into or past second crack and taste bittersweet and smoky, with oils visible on the bean surface.